👉 Let’s stay connected on social media!
How to Make Perfectly Soft Ciabatta Bread at Home
QUICK REMINDER:
While we have provided a jump to recipe button, please note that if you scroll straight to the recipe card, you may miss helpful details about ingredients, step-by-step tips, answers to common questions and a lot more informations that can help your recipe turn out even better.
Belief: store-bought bread is a scam powered mostly by our collective fear of sticky dough and commitment.
We’re living in an era where people will ferment oat milk on their counter for three days but look me in the eye and say, “Oh, I could never make bread.” Okay, but you will buy a $9 loaf that turns into sawdust the second it cools? Make it make sense.
Anyway. Hi, I’m Courtney, and I’m about to bully you (lovingly) into making ciabatta bread in your own home oven like it’s 2009 and food blogs still had 46 unedited photos per recipe. If you can stir lazily with a spoon and tolerate a gloopy bowl of dough existing in your kitchen overnight, you can do this. And then you can eat half the loaf over the sink in silence, which, frankly, is my religion.
If you’re already one of those people making your own sourdough, cool, I see you, but this is the low-commitment cousin. Like banana bread’s weirder, airier, more Italian friend. (Speaking of, if you have brown bananas staring at you right now, just know my heart belongs equally to that pan of banana bread brownies you should absolutely also be making.)
The Part Where I Absolutely Ruined the Ciabatta Bread First
The first time I tried ciabatta, I made what can only be described as bread anxiety in physical form.
The dough was… wrong. You know when something is both too wet and somehow too stiff? Like a stress ball left in the rain? It slapped the side of the bowl with this obscene shluck sound. My husband walked through the kitchen, heard it, and just quietly backed away. Correct.
The smell was floury but kind of sharp, like wet cardboard and nervous sweat. I kept poking it every 20 minutes like, “Are you… rising? Are we okay?” (We were not okay.)
Then there was the moment I tried to “shape” it. I had watched exactly 1.5 YouTube videos and thought I was Paul Hollywood. I floured the counter like a maniac, turned the bowl over, and the dough oozed out like a defeated jellyfish. It spread sideways instead of up, like it was trying to escape my expectations. Honestly, relatable.
I tried to fold it, but it kept gluing itself to my fingers. At one point I was holding the entire dough mass in mid-air, attached between my hands and the counter by a gluten rope, whispering “this is fine” as it made horrifying squelching noises.
The bake? Tragic. The outside burned in patches, the inside was raw in spots, and when I cut it open it looked like someone had baked a damp mattress. Dense. Gum-like. I could actually hear the knife squeaking through it. The smell was kind of sour but not in a sexy “naturally leavened” way—more in a “left your laundry in the washer for two days” vibe.
I thought I’d fix it by toasting slices. Spoiler: you cannot toast personality into dead bread. My toddler used a piece as a car ramp. It worked distressingly well.
And then I just…didn’t try again for months. I pivoted to safer carbs like my beloved chocolate espresso banana bread, which never judges me and always rises. Ciabatta and I were on a break.
What Finally Snapped Into Place (Sort Of)
Round two with ciabatta bread happened on a random Tuesday when I was already annoyed at everything. (Important detail. The energy matters.)
Instead of treating it like a fragile science experiment, I decided to be lazy and borderline disrespectful. Less “artisanal bread queen,” more “I’m dumping this in a bowl and going to bed.”
Emotionally, the shift was: I stopped expecting it to look like bakery bread mid-process. Ciabatta is supposed to be a chaotic swamp creature at first. It’s high hydration, which is a fancy way of saying “this dough is going to look wrong until it suddenly doesn’t.” Once I accepted that, I weirdly chilled out.
Practically, I changed a few things:
- I stopped over-mixing. No kneading marathons. Just stir until it’s a shaggy, sticky mess and walk away.
- I gave it a full 12–18 hour rise and, crucially, left it alone. No “just checking” stirs.
- I used more flour on the counter but less on top of the dough, so it could still stretch instead of turning chalky.
Little realizations: the dough should wobble like a slow-motion water balloon when you move the bowl. When you poke it, your finger should leave a gentle dimple that doesn’t fill back all the way. When you tip it out, it should kind of sigh.
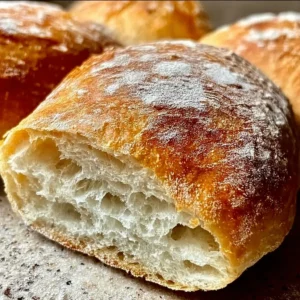
The second bake came out golden, bubbly, light. The crumb—the inside—had these big uneven holes that felt like winning the lottery but for sandwiches. It smelled nutty and warm, the way flour transforms when it finally forgives you. I tore into it while it was still almost too hot and burned my fingers a little and did not care.
Do I trust it completely now? Absolutely not. Every time I cover that bowl for the night I have a tiny fear that future-me will wake up to another dough crime. But this version works, repeatedly, with boring reliability, which is honestly the sexiest quality in a recipe.
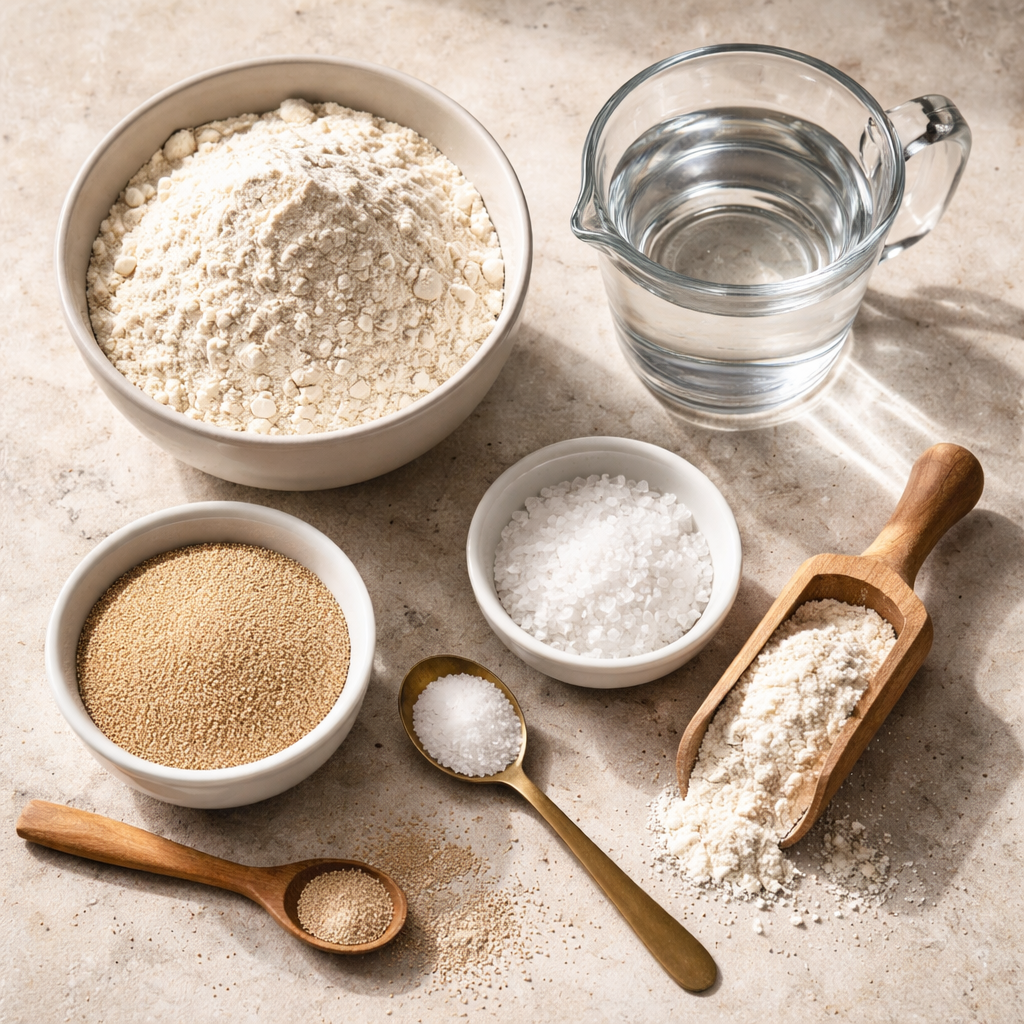
What You Actually Need in the Kitchen
- 4 cups all-purpose flour
- 1 1/2 cups water (room temp, not ice-cold, not hot—just “eh, seems fine”)
- 1 teaspoon active dry yeast
- 2 teaspoons salt
You can get fancier flour if you want, you high-achiever, but regular all-purpose from the grocery store is absolutely fine. This is the broke-but-determined bread, the “I want bakery vibes on a Tuesday and don’t feel like going outside” bread. The texture sweet spot is: chewy crust, tender inside, holes big enough that your olive oil gets trapped, not so big that your sandwich fillings escape and file for divorce.
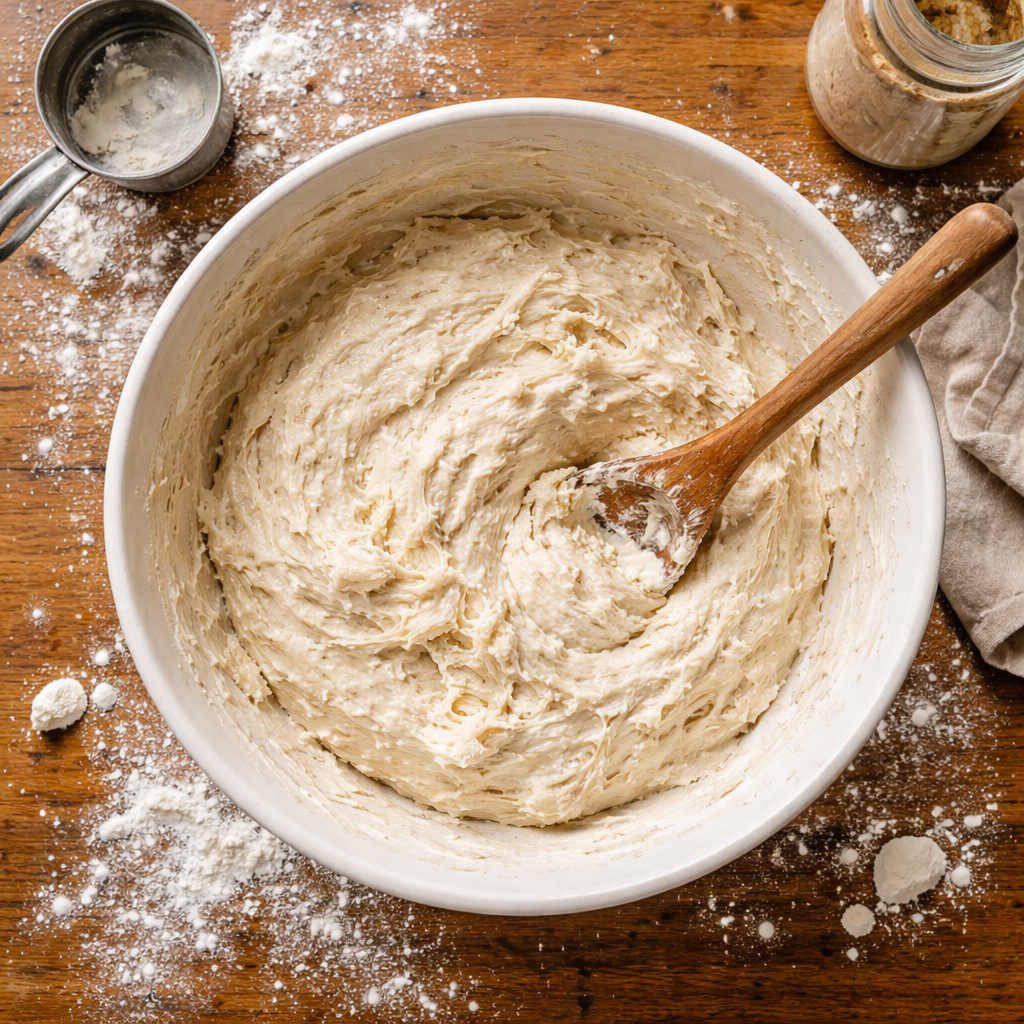
How the Whole Beautiful Mess Comes Together
- In a large bowl, combine flour, yeast, and salt.
- Add water and mix until a dough forms.
- Cover the bowl with plastic wrap and let it rise for 12-18 hours at room temperature.
- Turn the dough out onto a floured surface, then gently stretch it into a rectangle.
- Fold the dough in thirds like a letter, then transfer it to a floured baking sheet.
- Cover with a kitchen towel and let rise for another 1-2 hours.
- Preheat the oven to 425°F (220°C).
- Bake for 25-30 minutes or until golden brown and hollow-sounding when tapped.
Okay, but here’s how it actually feels in real life: you stir until it’s a sticky chaos ball, say “this looks wrong,” cover it anyway, and go live your life. Don’t panic when, after the long rise, it’s basically a bubbly pillow that threatens to deflate if you look at it weird. That’s good. Swagger dough.
When you turn it out, FLOUR THE COUNTER. More than you think. But then, when you’re stretching it into that rectangle, chill with the flour on top. Think: dusty, not buried. Fold it gently—this is a love letter, not origami. If it sticks to your fingers, use a bench scraper or just accept that you’re one with the gluten now.
The second rise is when it suddenly looks like something you might buy. It puffs, the surface gets tiny bubbles, and if you shake the pan, it does this soft jiggle that lives rent-free in my head. Bake it in a fully preheated oven (no cheating) and if you’re nervous, peek at 20 minutes. The top should be golden with a few deeper spots, and when you tap the bottom, it should sound like someone lightly knocking on a wooden table.
Also, you’re allowed—encouraged—to rip a piece off the second it’s cool enough to handle. “Cooling completely” is for food stylists.
Your Kitchen, My Kitchen, Same Chaos
Be honest: are you already mentally clearing a space on your counter or are you still stuck on the image of the dough jellyfish? Because same.
I know some of you are reading this thinking, “Okay Courtney but my kitchen is tiny / my kids will poke it / my cat will sit in the bowl.” Yes. Yes to all of it. That’s the point. This bread is extremely “life is happening” friendly. You mix it at night, shove it somewhere vaguely safe, and in the morning you have this insane dough blob that looks like it’s breathing.
Do you ever feel weirdly guilty throwing flour everywhere? Like the ghost of your mother is whispering about “waste” even though it’s literally pennies? I had one woman message me that she shapes her bread on a baking sheet inside a garbage bag so the flour mess is contained and honestly, that’s the kind of chaotic energy I respect deeply.
Also, there will be crumbs. They will be everywhere. On the floor. In your bra. Someone will inevitably walk through the kitchen mid-slice and grab an edge piece with no plate and then vanish. If that person is you, congratulations, you are my people.
Talk to me if you make it and something weird happens. Flat loaf? Burnt corners? Your dough climbed the bowl and tried to unionize? Comment, scream, send photos. We’re all just collectively failing and succeeding at carbs together.
Questions You’re Already Thinking
Yes, absolutely. Use the same amount. Instant yeast is like the friend who shows up early to everything, so your dough may rise a little faster. Still, I’d give it the long overnight time because that’s where the flavor gets dreamy.
Sticky is good. Sticky is the whole point. If it’s a sloppy, webby mess that clings to the spoon, you’re in the right neighborhood. Just flour your hands and counter when you shape. If it’s actual liquid, you may have mis-measured the water, but short of that, lean into the chaos.
You don’t have to, but rushing it gives you sad, flat bread and I will be silently disappointed. Minimum 8 hours if your kitchen is warm and you’re impatient, but the flavor and texture are so much better with the full overnight rest. Treat it like future-you’s surprise.
Yes. Let it cool completely, then wrap tightly and freeze. When you want it, reheat in the oven at 350°F until warm and crisp again. Toasting slices straight from the freezer also works and is dangerously convenient.
That’s just moisture from the inside migrating to the crust as it rests. Let it cool on a wire rack so air can circulate, and if you want that shatter-y crunch back, pop it into a hot oven for 5–8 minutes. Crisis averted.
Sometimes I think the real reason I love this bread is because it’s proof a thing can look deeply wrong for most of its life cycle and still turn out lovely in the end. Like, imagine judging it at hour three—sticky, weird, unphotogenic—and then missing the part where it transforms in the oven.
Anyway, now I have to go rescue a pan of something else I definitely didn’t forget in the oven while typing this, but you, you should probably go stir some flour and water together and see what happens next…
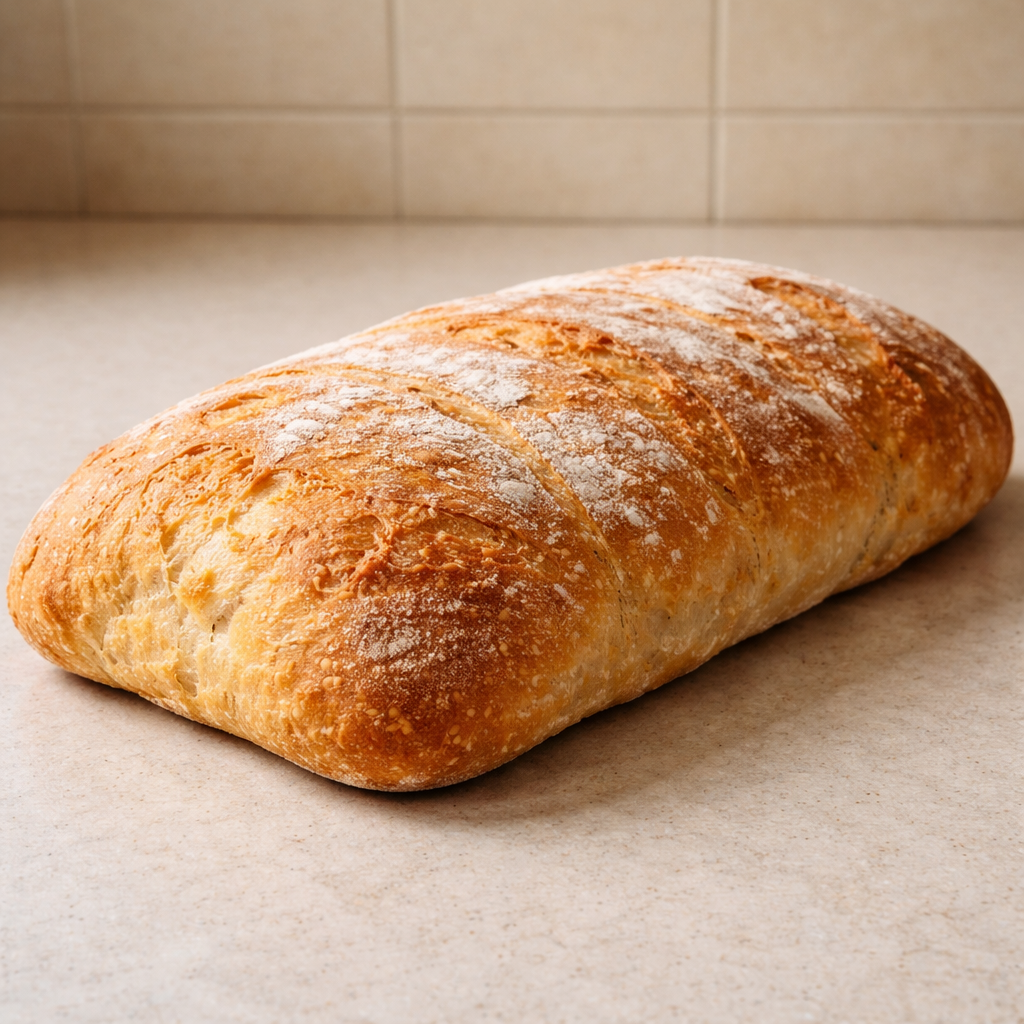
Ciabatta Bread
A simple and forgiving recipe for homemade ciabatta bread, perfect for those new to baking bread. This airy and chewy bread is made with just a few ingredients and requires minimal hands-on time.
Ingredients
Bread Ingredients
- 4 cups all-purpose flour Regular flour from the grocery store works well.
- 1.5 cups water Room temperature, not ice-cold, not hot.
- 1 teaspoon active dry yeast
- 2 teaspoons salt
Instructions
Preparation
- In a large bowl, combine flour, yeast, and salt.
- Add water and mix until a dough forms.
- Cover the bowl with plastic wrap and let it rise for 12-18 hours at room temperature.
- Turn the dough out onto a floured surface, then gently stretch it into a rectangle.
- Fold the dough in thirds like a letter, then transfer it to a floured baking sheet.
- Cover with a kitchen towel and let rise for another 1-2 hours.
- Preheat the oven to 425°F (220°C).
- Bake for 25-30 minutes or until golden brown and hollow-sounding when tapped.
Notes
This recipe is very forgiving. Don't panic if the dough looks wrong; it's meant to be sticky and messy. Flour your counter generously when shaping. Don’t rush the rise time for better flavor and texture. This bread keeps well and can be frozen.