👉 Let’s stay connected on social media!
How to Make Crispy Italian Bread at Home: Easy 5-Step Recipe

QUICK REMINDER:
While we have provided a jump to recipe button, please note that if you scroll straight to the recipe card, you may miss helpful details about ingredients, step-by-step tips, answers to common questions and a lot more informations that can help your recipe turn out even better.
Bread should not be a personality, and yet here we are.
Some people coped with the last few years by doing yoga or learning a language; I coped by screaming into a bowl of flour and pretending gluten was a personality trait. There was a week in 2020 when my entire Instagram feed was just beige loaves and people saying “she’s not perfect but I love her,” about bread. Not children. Bread.
And now I’m here, fully aware of the irony, telling you about this easy Italian bread recipe like I didn’t once mock the entire “just bake!” culture. Anyway. Hi, I’m Courtney, and I think a crispy, crackly loaf on the counter can fix at least 40% of a bad day. Maybe 50 if you also make banana bread brownies.
Also: store-bought “Italian bread” that’s soft and squeaky and deflates if you look at it wrong? Jail.
The Time My Italian Bread Almost Broke a Car Window
The first time I tried to make this, the dough sounded wrong. Yes, sounded.
It slapped the counter like wet gym socks. Not in a good thwack way, in a sad, flapping way. The smell was… aggressively yeasty, like a frat house kitchen the morning after. I actually wrote “smells like hot beer breath” in my notes and then immediately wished I hadn’t.
The crust? Nonexistent. It came out looking like a beige pillow. I cut into it and it sighed at me. Like, truly exhaled steam and shame. The inside was gummy and stretched like mozzarella, except tragically not mozzarella. We tried to toast it and it just… steamed itself even wetter.
My husband took one bite, paused, and then said the worst possible thing:
“Oh, it’s not that bad.”
If anyone tells you that about your bread, you throw the whole recipe away and also maybe your baking sheet.
I messed it up again a week later, but in a different way because growth is not linear. This round, I got scared of sticky dough (rookie mistake) and kept tossing flour at it like I was trying to put out a fire. The dough got stiff and squeaky. Like, it literally squeaked as I kneaded it. The loaf baked up into this tight, heavy brick that smelled… fine, but when you tapped the bottom it thunked like a small drum. Or a weapon.
My kids used that one as a toy. I wish I were kidding. They rolled it across the floor to the dog, who refused to eat it, and this is the same animal that once swallowed half a sock.
Also there was the time I forgot the salt, which I will not emotionally unpack here because that bread tasted like sadness and paste and I nearly cried into a bowl of olive oil.
I’d love to say that’s where I learned my lesson and turned it around, but actually I just rage-quit bread for three months and made an embarrassing amount of stuffed portobello mushrooms instead.
Why This One Finally Behaves (Most of the Time)
So what changed? Honestly, not much and also everything.
I stopped trying to make “perfect bakery bread” and started aiming for “doesn’t humiliate me at dinner.” Once the bar lowered emotionally, the bread got better physically. There’s a metaphor in there, but I’m ignoring it.
The heart of this easy Italian bread recipe is so painfully simple it’s almost rude:
– slightly warm water,
– don’t rush the yeast,
– stop being afraid of sticky dough,
– hotter oven than you think.
That’s it. That’s the plot twist.
The big realization was the water temperature. For months I was microwaving it into oblivion, basically waterboarding the yeast. Now I use “baby bath warm” water — that weirdly specific 110°F range where it feels cozy but not hot. Once I started letting the yeast sit on top like a dramatic little foam island for 5 minutes, it finally did its job.
Emotionally, I also stopped hovering. I used to poke the dough every five minutes like it was going to text me back faster. Now I let it rise, I walk away, I fold laundry or doom-scroll or plan what crispy rice thing I’m making next, and I come back to a dough that has doubled instead of deflated from sheer stress.
Is it perfect every single time? No. Sometimes it goes rogue and the slashes on top explode like a sci‑fi movie. Sometimes the crumb is tighter than I want. But the crust? The crust is consistently golden, shattery, and loud enough that you can hear it crackle when it comes out of the oven, which is deeply satisfying and slightly unhinged.
So yeah, it works now. I trust it 90% of the time. The other 10% is just my personality.
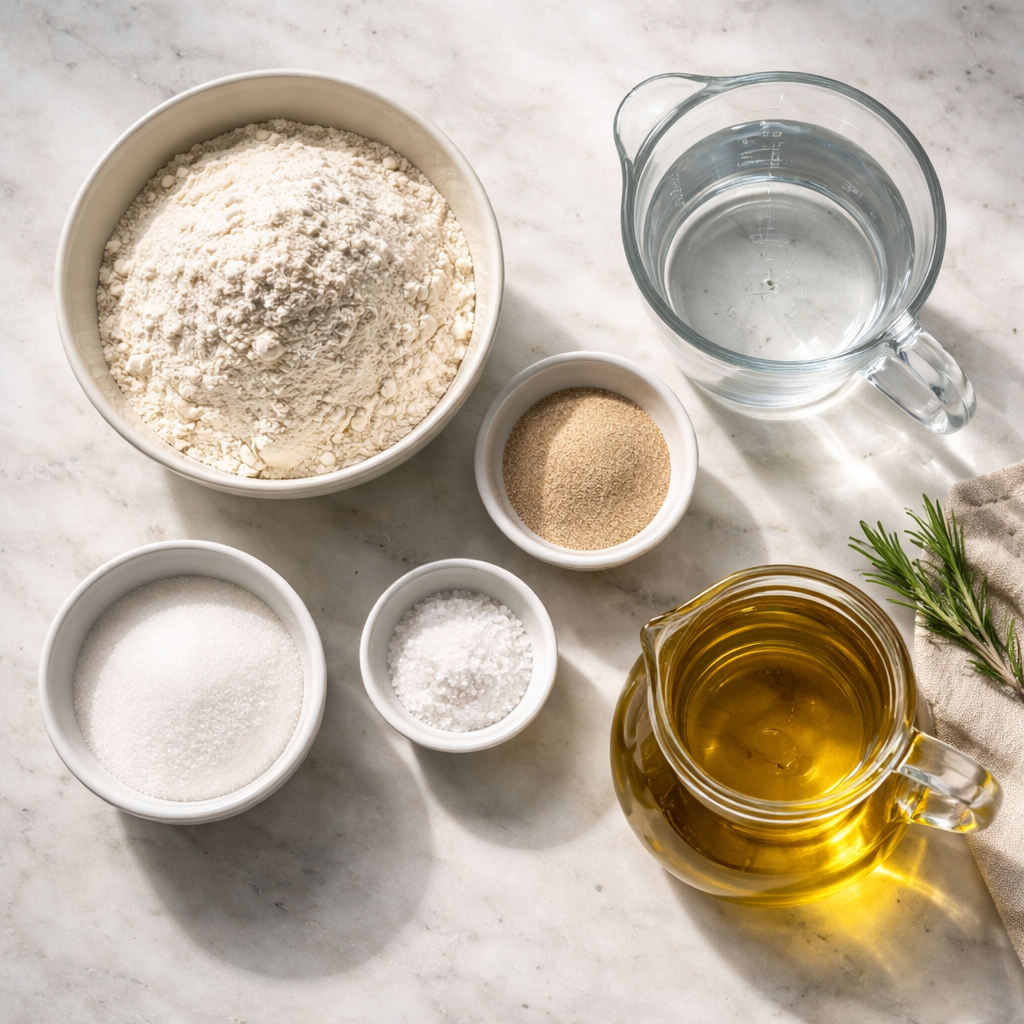
What You Actually Need in the Kitchen
- 1.5 cups warm water (110°F / 43°C)
- 2 teaspoons active dry yeast
- 1 pinch sugar (optional)
- 4 cups all-purpose flour (480g)
- 2 teaspoons salt
- 2 tablespoons olive oil
If you’re on a budget, this is a deeply respectful $2 situation that makes you feel like an Old World nonna even if you’re standing in a rental kitchen with flickering fluorescent lights. Flour-wise, yes, you can swap in part bread flour for a chewier bite, but AP flour does just fine and is probably already in the weird back corner of your pantry with the forgotten baking soda. Olive oil: doesn’t need to be fancy, just not the one that smells rancid when you open it (we’ve all made that mistake once).
How the Chaos Turns Into a Loaf
- Pour warm water into a mixing bowl. Sprinkle the active dry yeast over the surface and let it sit for 5 minutes until foamy.
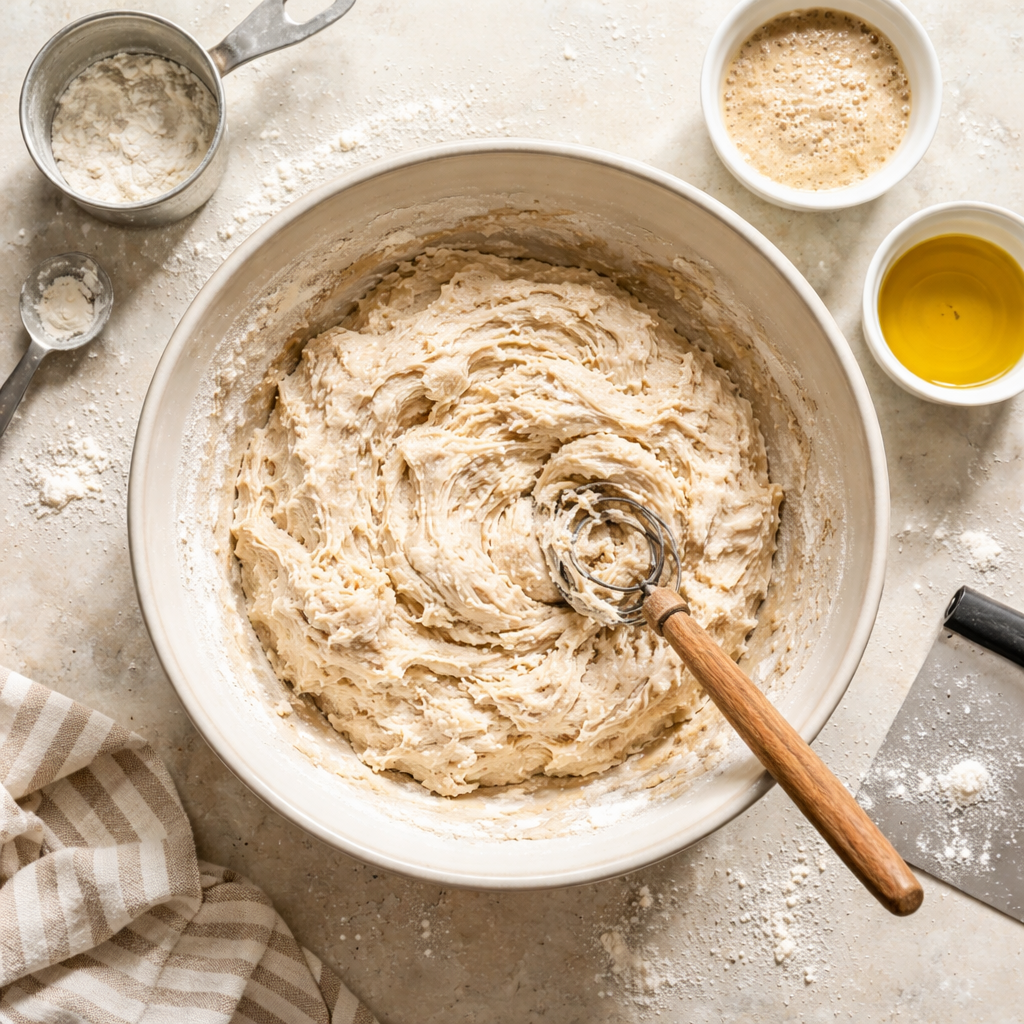
- Add all-purpose flour and salt to the yeast water. Drizzle in olive oil and stir until a shaggy dough forms.
- Turn the dough onto a floured surface and knead for about 10 minutes until smooth and elastic.
- Place the dough in a lightly oiled bowl, cover with a towel, and let it rise in a warm place for 1 to 1.5 hours until doubled in size.
- Preheat your oven to 450°F (232°C). Shape the dough into a loaf, score the top, and bake for 30-35 minutes until golden brown.
Okay but let’s be honest about how this actually looks:
You pour the water, sprinkle the yeast, and then stare at it like a science experiment, wondering if it’s “foamy enough” or if you’ve ruined everything and need to start over. (If there are little beige bubbles and it looks a bit creamy on top, it’s fine. Relax. If it’s totally flat and dead, THAT’s when you panic.)
When you add the flour and salt, it should look like a shaggy, scruffy dog — not smooth, not elegant. Just rough. Sticky but not soup. If it sticks aggressively to your hands, sprinkle in a bit more flour. If it’s stiff and tearing, you went too far with the flour; drizzle a tiny splash of water and pretend you didn’t.
Kneading is where most people give up, and also where the magic lives. The dough starts out lumpy and slightly disrespectful, then after 8–10 minutes of pushing and folding and turning, it suddenly smooths out and feels bouncy, almost alive. When you poke it, it should spring back slowly, like it’s thinking about it. THAT’S the moment.
The rise is just: tuck it into a warm corner, cover, and ignore it for an hour. If your kitchen is cold, stick it in the oven with the light on (oven OFF, please, we are not baking the bowl). When it’s doubled, don’t overthink shaping — a simple log or oval is fine. Slash the top with something sharp (this is so it expands where you want instead of exploding out the side like a bread volcano).
And then into the very hot oven it goes, and suddenly the whole house smells like you know what you’re doing. Which you do. Mostly.
Let’s Talk While the Dough Rises
Are you also the kind of person who starts bread and then immediately remembers you have to pick someone up in 45 minutes? Because same.
I feel like there are two kinds of home bakers:
- The serene ones who proof in glass bowls and take aesthetic photos.
- The rest of us, who are like, “If I put this bowl on top of the dryer while it’s running, is that a proofing box or an OSHA violation?”
If you’re reading this thinking, “I cannot be trusted with yeast,” I need you to know that you can. If you can forget laundry in the washer for 12 hours and rewash it three times, you can absolutely handle checking if your dough doubled. Low bar.
Do you also get weirdly territorial about your loaf once it’s out of the oven? Like, I will happily share almost anything I cook, but if someone comes at the end crust (the best piece, we all know this) without asking, I feel it in my soul.
Also, can we normalize serving a big slab of this with just olive oil, salt, and a sad side salad and calling it dinner? Because the number of nights I’ve done that and told myself it was “rustic” and “intentional” is… high.
Tell me if your dough climbed the side of the bowl like a horror movie blob. Tell me if you forgot it for three hours and it still worked. I promise, whatever happened in your kitchen, I’ve done worse.
Questions You’re Probably Already Googling
Yes, absolutely. Use the same amount (2 teaspoons), skip the 5‑minute “getting foamy” wait, and just mix it right in with the flour and salt. The rise time is usually a bit faster, so start checking your dough around the 45‑minute mark instead of assuming it needs the full 1.5 hours.
Probably not. Sticky is normal; wet and pourable is not. Dust your hands and the counter with a little flour and keep kneading. Add flour in small amounts, like a tablespoon at a time. If you dump in an extra cup “just in case,” that’s when you end up with sad, dense bread.
Nope. The pinch of sugar just gives the yeast a snack and helps it wake up faster, but if you forget it, the bread will still rise as long as your yeast is alive and your water isn’t lava.
Let the loaf cool on a wire rack, not on a plate or cutting board where steam gets trapped and softens the bottom. Once it’s fully cool, store it cut-side down on the counter, uncovered, for the first day. Plastic bags = soft crust. Great for sandwiches, terrible for drama‑level crunch.
Yes. Let it cool completely, then wrap it tightly in foil and stick it in a freezer bag. When you’re ready, reheat it in a 350°F (177°C) oven for 10–15 minutes. Is it exactly the same as fresh? No. Is it still way better than the sad grocery loaf? Extremely yes.
I always think I’m making this loaf “for later” and then we stand around the cutting board, tearing off pieces while it’s still too hot and burning our fingers, and suddenly half of it is gone and someone is asking if we “have any more bread,” like I run a small underground bakery in my pantry.
There’s something embarrassingly tender about hearing that first crackle when you take it out of the oven, like proof that time passed and you did one small thing right today. Anyway, I was going to say something profound about gluten and comfort and inherited rituals but the timer just went off and I’m 99% sure I left the second loaf in a little too—
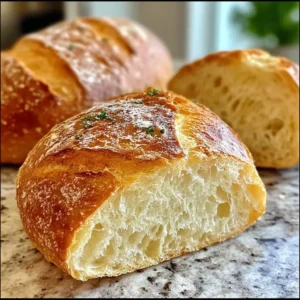
Easy Italian Bread
A simple and comforting recipe for crusty Italian bread that yields a golden, crackly crust and soft interior.
Ingredients
Dough Ingredients
- 1.5 cups warm water (110°F / 43°C) Use baby bath warm water.
- 2 teaspoons active dry yeast Make sure it’s fresh for best results.
- 1 pinch sugar (optional) Helps yeast wake up faster.
- 4 cups all-purpose flour (480g) Can swap in part bread flour for chewier texture.
- 2 teaspoons salt Essential for flavor.
- 2 tablespoons olive oil Not necessary to use a fancy one.
Instructions
Preparation
- Pour warm water into a mixing bowl. Sprinkle the active dry yeast over the surface and let it sit for 5 minutes until foamy.
- Add all-purpose flour and salt to the yeast water. Drizzle in olive oil and stir until a shaggy dough forms.
- Turn the dough onto a floured surface and knead for about 10 minutes until smooth and elastic.
- Place the dough in a lightly oiled bowl, cover with a towel, and let it rise in a warm place for 1 to 1.5 hours until doubled in size.
Baking
- Preheat your oven to 450°F (232°C). Shape the dough into a loaf, score the top, and bake for 30-35 minutes until golden brown.
Notes
Let the loaf cool on a wire rack to keep the crust crispy. Store cut-side down on the counter uncovered for the first day.